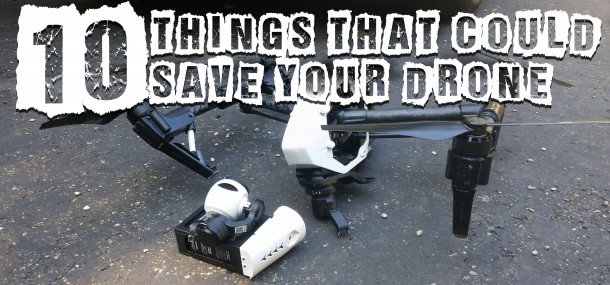
10 things that could save your drone
Click here for a German translation of this post.
If you’re interested in drones you will have no doubt seen all the spectacular crashes on YouTube and heard about drones flying away by themselves. Drones like the DJI Inspire 1 or Phantom 3 are highly complex devices that rely on various systems to perform properly. While there’s no way to guarantee against a hardware or software problem there are a few things you can do to minimise the chances of crashing. Here are my top tips that could save your DJI drone.

1. Know when and when NOT to calibrate the compass
A lot of people recommend calibrating the drones compass each time it’s flown at a different location. While this seems to work for some I think it introduces unnecessary risk. Let me explain why…
When you perform a compass calibration you’re letting your drone test its surroundings for magnetic force and once the calibration is complete it stores that data and assumes that those forces are normal for the current location and will be consistent throughout the flight. But what if there’s a large electrical cable or metal pipework buried below the paving you’re standing on? If that were the case then the calibration you’ve just performed will have taken those effects into account and the moment the drone takes off it will be flying with incorrect compass data.
Unless you’ve travelled a long way (hundreds of miles) since your last flight there’s no real need to re-calibrate the compass if you already have a good calibration locked in. If you find yourself in a nice open undeveloped area then it’s a good time to grab a clean compass calibration, otherwise why replace a clean calibration with one from an area where you have no idea what unknown forces are at play.
2. Know when and when NOT to calibrate the IMU
An IMU calibration resets the gyroscope and accelerometer data to tell the aircraft when it’s perfectly level and not moving. I only do an IMU calibration after a firmware update or if I’ve travelled to another country and the drone could have suffered knocks or large atmospheric changes.
In order to get a good IMU calibration the drone should not be hot, so it should never be done after the drone has been running. The aircraft should have been switched off for at least ten minutes and ideally be in a cool location such as an air-conditioned room or in a cool climate. The drone should be placed somewhere stable and ideally a spirit level placed across from motor to motor to check for perfect level. Each foot can be adjusted by placing pieces of paper underneath until perfect level is achieved. Once level the IMU calibration should be started as soon as possible after switching on the drone and then there should be no movement of the drone during the calibration process.
Once complete the IMU calibration should be good until the next firmware update or the airframe is exposed to large forces.
3. Check Sensors every flight
So with points 1 & 2 in mind you shouldn’t need to calibrate anything prior to each flight, however it is very important to check what the sensors are reading and understand if you do need to take action.
With the drone powered up and the DJI app running you can navigate to the MC Settings page and then scroll down and select the Sensors view that should look like the image below.
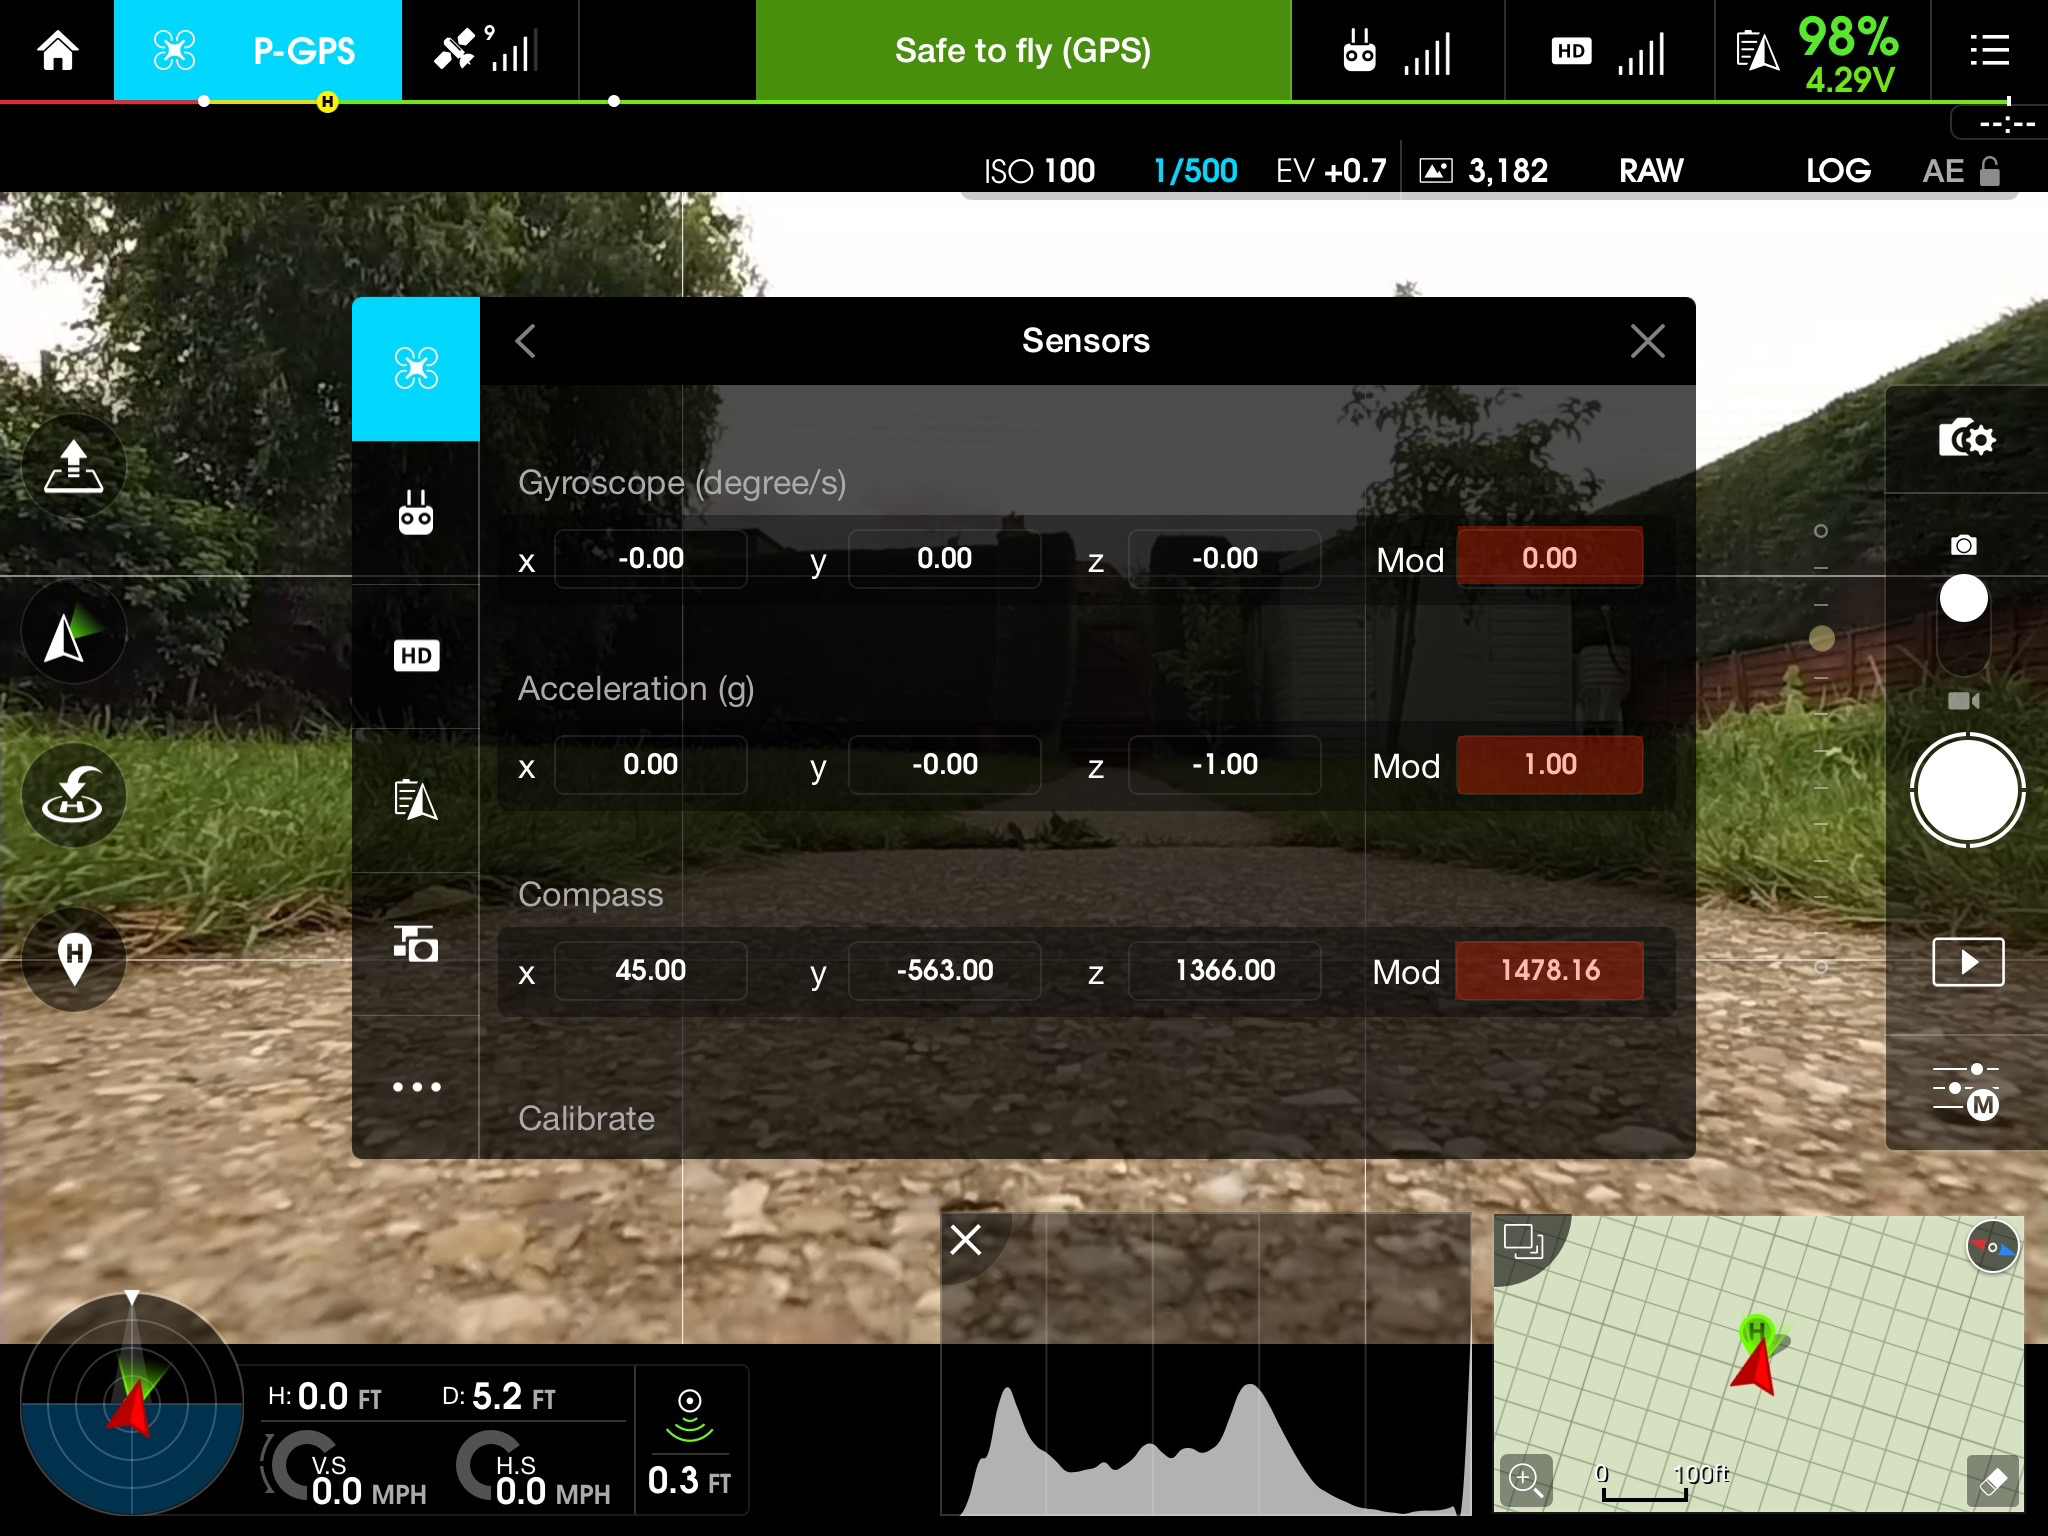
I’ve highlighted the values you need to pay attention to in red. The compass data is the lower of these three Mod values. This number will always be changing but I like it to stay between 1400 & 1599. One good test is to leave this page open and then carry your drone around and watch how different objects affect this value. If you’re indoors then you’ll see huge changes near power cables and pipework or if outdoors try placing the drone in various places on pavements and you’ll likely see big changes as hidden pipes or buried power cables have an effect.
If you see out of range numbers in a location where you need to fly then try moving the drone to a different take off area to see if the reading is better. If you still can’t achieve normal readings then try holding the drone at head height, you may find that if there’s something underground affecting the readings the results could be better once clear of them. That’s why it’s important not to calibrate blindly, you need to understand what’s happening with the sensors and make the call when to calibrate accordingly.
If I’m in a location that’s giving out of range readings on the ground I’ll generally trust the compass calibration I’ve already got locked in and take off and land using P-ATTI mode so as the ground interference doesn’t affect the system. Obviously if the readings are out wildly then it’s probably not going to be safe to fly at all. There’s no real fool proof process, but it’s better to have an understanding of what your drone is sensing than to just calibrate it to its surroundings regardless of whether those surroundings will remain the same once you’ve taken off.
The other readings highlighted show the Mod values for the Gyroscope and Accelerometer. In my experience once an IMU calibration is complete these are very rarely out and only vary by 0.1 values. Obviously if you see bigger differences and the drone is not moving then don’t fly as the IMU is not calibrated correctly.
4. Land at 30% battery and beware the 10% failsafe
It’s important to land with power in reserve because if something were to happen that requires you to delay the landing you need enough time to either find a new landing spot or deal with the problem. The other important factor to bear in mind is that when the battery hits 10% a DJI Inspire 1 or Phantom 3 will automatically initiate it’s “Smart Go-Home” feature and head for its home point.
While heading home at 10% may seem like a useful safety feature it can also be disastrous! Let’s say for instance you’re coming in to land and decide to bring your drone down in the field adjacent to the one where you took off. Everything could be going to plan but if the battery were to hit 10% the drone would automatically change direction and head for its home point giving you little time to respond. If there are any trees or other obstacles between the drone and its takeoff point it will fly straight in to them.
Recently DJI have added an option to disable Smart Go-Home which can be seen in the image below.

By disabling this option the drone will simply initiate a landing at its current location rather than head home once it reaches 10% power. As always though you need to make the call with each flight, as there could be times when it’s better to leave Smart Go-Home enabled. The Go app also monitors the power required to get the aircraft back to the home point and will initiate a return to home automatically if Smart Go-Home is enabled.
5. Check the failsafe height and home point every flight
If the drone loses signal from the controller or the pilot initiates the Return To Home feature it will climb to a predetermined altitude before heading to the home point. You should always check the area you’re flying in and make a best guess as to what would be the safest altitude for the drone to return at without hitting an obstacle. The temptation is to set the maximum allowed height but you may be in a situation where battery power is low or flying to that altitude could present other dangers to your drone or to other air users. It’s better to set an altitude that puts you well clear of any obstacles without having to fly to max altitude.
 It’s also important to check that the correct home point has been set for each flight. When the motors start there should be an audio alert saying “The home point has been updated, please check it on the map“, it’s worth doing that just to make sure the home point is where it should be.
6. Switch tablets and phones to Airplane mode
Any devices that transmit can have an effect on the communication between your drone and the remote controller. Most DJI systems use 2.4 Ghz as a control frequency, which is the same frequency used for domestic WiFi. While the two can exist side by side you will find that interference can occur and control distances decrease so where possible always switch mobile devices and especially tablets used on the remote in to an Airplane safe mode which disables all output from the device including bluetooth and telephone communication.
One downside to switching the controller tablet to Airplane mode is that the live map view will no longer load content. You can however pre-load map data by prior to entering airplane mode by pressing on the map and then scrolling around the area that you will be flying in. The map data should remain visible once airplane mode is enabled.
If the map data is not cached then check ‘Cache Map in the Background’ is enabled in General Settings in the Go App.
7. Be careful with P-GPS, take control with ATTI mode
The two main flight modes on a DJI drone are P-GPS and ATTI ( attitude mode). Using GPS to stabilise a drone is extremely useful, the drone stops and holds position where it’s told to and even helps you to fly in the right direction in windy conditions. We’re also seeing advanced GPS modes used such as follow me, orbit modes and waypoint steering, and these are all very useful but the thing to remember is that any time you’re using a GPS mode the drone is essentially flying itself. You might be telling the system where you want it to go, but it’s making the decisions about how to get there itself. Occasionally things can and do go wrong!
Many people make the mistake of thinking they are in full control when flying in P-GPS mode and then get frustrated when something goes wrong and the drone becomes uncontrollable. Rather than trying to fight the failing GPS system what you need to do in that situation is take control using ATTI mode.
The first thing to note is that by default DJI doesn’t allow access to ATTI mode on the controller. Yes there’s a nice little switched marked P and A but moving the switch to A will not engage ATTI mode unless you first enable it in the DJI Go app.
In the image above note the option called “Multiple Flight Mode”. With Multiple Flight Mode enabled you can now switch to ATTI mode using the mode switch on the controller. Flying in ATTI is not that different from flying in GPS mode: the drone will still maintain its altitude and the controls still function the same. The main difference is that the drone will no longer hold position automatically, it will be affected by any wind as well as its own inertia.
I always think of ATTI mode as being like a pebble on a frozen pond: if you give it a push in one direction it will keep going, so in order to stop it you need to push it back in the opposite direction. Practise flying ATTI in the DJI simulator and then try it in an open field where you have room to make mistakes. It shouldn’t take long to get to grips with it and then you’ll have the ability to take control if GPS fails or the GPS control system isn’t functioning correctly.
I always look at P-GPS as a feature to use occasionally now and fly in ATTI most of the time. I always take off in P-ATTI mode as well as the worst time to discover a GPS fault is upon takeoff when you have little time to adjust to the situation. Obviously this requires careful operation if it’s windy so take care trying it and be aware of the wind direction and speed before taking off.
8. Check props, and check again!
I see so many reports of people crashing their drones due to a prop “flying off”. While I’m sure a prop can wear and / or break I expect that most of the time it’s down to a prop not being securely fitted in the first place. We humans tend to make mistakes and when doing something repetitive like fitting props it’s very easy to overlook something.
If using self-tightening props always wind them on and then hold the motor for the final tighten. With the Inspire you can also fit prop locks to further reduce the risk of a prop working loose. If using DJI’s new quick release props on the Inspire 1 or Matrice then it’s important to ensure that each prop has popped up into its locked in position. Watch the base of the prop and as you push down twist it; that way you can confirm it visibly raises on the springs as it enters its locked position. With the quick release props you should confirm correct fitment by holding the motor and attempt tuning the prop in both directions to check it’s locked in.
Later during my pre-flight routine I always check the props again, it may seem a drag but a lost prop on a quad will result in a crash, it’s better to be sure that are fitted than to lose that expensive drone.
9. Use a pre-flight check list
Using a pre-flight check list can be dull, especially when you’re excited and just want to get flying, however there’s no better way to make sure you’ve done everything you can to ensure a safe flight. It doesn’t need to be overly complicated, if you go silly and put every step down you’ll find you don’t bother using it at all. Just put the basics down read through it as you set up. It can be as simple as the following…
Airframe: Prepare & check
RC: Fit iPad, cable & Hood
Antennas: correct position
Props & Locks: attach & check
RC Battery: Check min 75%
RC Switches: Correct mode & Gear Down
iPad: App running, map cached, Airplane mode, Volume Up.
Airframe: Position for takeoff
Props: 2nd check
Power On: Check battery 100%
Sensors: Compass 1400 – 1599
Sensors: IMU +/- 0.1
Failsafe: Set failsafe height
Satellite: At least 7 sats & safe to fly box
Flight Mode: Correct mode selected
Start Motors: CSC command
Home Point: Blue dot Location correct on map
Initial Check: motor sound check
Climb: climb to 2m
Control Tests: Test all controls
GPS & ATTI Test: Test both modes function correctly
Landing Gear: Raise Gear and fly!
10. Line of sight = Line of communication
If you can see your drone then the chances are the remote control can also communicate with it. Distance can have an effect on radio communication and the laws vary from country to country on how far you can fly a drone. Here in the UK we are limited to flying within line of sight (defined as 500m from the pilot). It’s not all about distance though!
Lets say you’re filming a large circular water tower that’s only 30m away and you’re thinking about grabbing a nice orbit shot around it. Even though the drone may only be 40m from you as it passes around the back of the tower there’s a good chance control will be lost as the radio signal cannot transmit through the tower. At that point the drone would switch to failsafe mode, climb to the preset altitude and then fly back to home point. If you’d set the failsafe altitude higher than the tower and there were not other obstacles in the way you might be fine. If the failsafe altitude was lower than the height of the tower then it would be goodbye drone!
Try and keep the drone in sight at all times.
11. Know when to disable VPS
Okay I know that’s more than 10, this one is a bonus! The Phantom 3 models as well as the Inspire 1 both include VPS (Vision Positioning System) modules that help maintain position and height at low altitude. Most of the time the VPS will help you but there are times when having it enabled could cause you problems.
If you’re flying indoors or in an exterior location with objects above the drone you might want to disable the VPS to stop the drone from maintaining its height automatically. If for instance the drone is flying over objects on the ground then having the VPS enabled will result in the drone adjusting its height as it passes over each object and possibly colliding with the ceiling or obstacles above it.
You can disable VPS in the Go app as seen in the image below…

12. Always start with a fully charged battery
So calling it 10 things may have been a mistake… taking that on board now! I had to add this one because I’ve seen a few crash reports that are down to starting a flight with a previously used battery. It normally goes something like this…
“So I started my flight at 80% battery and all was going fine then all of a sudden it dropped to 7%, WTF!”
DJI responded to such comments saying that the intelligent batteries need to be fully charged at the start of each flight “as per the manual” in order for their usage monitoring to give reliable results. While you’ll probably get away with using a semi-charged battery most of the time, this could happen so be aware, and don’t fly too far from a safe landing spot.
I hope that proves useful, please feel free to leave a comment if you have any questions or suggestions. Fly safe!


I just wanted to apologise for not answering some these questions, I had to take a break from the blog over the past few years but I’m back now and promise to answer any new comments so just let me know if you have any questions. I’ll assume the questions from 2018 are no longer waiting for a reply but I’ll answer anyway for any future visitors.
when my phantom reaches altitude once i let go of the stick it desends by itself .Why ?
I’m not sure, it shouldn’t do that. Maybe check the sticks are calibrated.
Great Article, very well written.
I am just about to do a job with the Inspire 2 indoors so found this article searching for tips. I will certainly disable VPS and fly in atti mode of course. Thanks again for taking the time to write a good blog.
This article helped me here in brazil. Just writing to let you know there is no limits for your knowledge. Thanks for sharing it!
Thank you for this excellent article.
Hello, is this guide applicable to the dji mavic pro (if all the atti thing is taken apart – mavic doesn’t have ATTI mode)? Are the “ok values” (ex. Compass 1400 to 1599) the same for the mavic?
Thanks in advance!
Probably not, plus I think with the newer software the app will warn you if the sensors are nearing a bad values.
Thank you for this content
Thanks for these steps!
I printed it out and will take it with me when i go fly my Phantom 3Adv.
Great tips! I did have a question about the inspire 1. Recently I’ve been told to upgrade my camera and firmware. I googled reviews, which weren’t great. Anyways the firmware version is 1.7.60. How as a pilot do you know if the firmware is a good one to update to? Thank you
Great article. What does CSC command mean? (Under start motors on your checklist)
Paul,
Just one question of putting the iPhone into airplane
mode.
I asked this question re travelling overseas and not
wanting to roam
However, I often live stream ; could this potentially
cause an issue ?
Great 10 points to live by (or 12 points) Having flown a P3A for almost 1 year I read your list thinking to myself, “okay I know all this”, but, then I thought- When was the last time I did a pre-flight check following ALL these points, yep, I;ve gotten lazy & let me pre-flight list slide. Your post is/was a great wake up call to remember, I’m flying a object at 400′ that could really cause some damage!
Great wake up call, thanks so much !!
Roger- Ontario, Canada
My new phantom advanced os refusing to fly. Sensor wrror stating IMU failing to initialize. Any ideas.how to resolve. I habe tried all recommendations by Dji and Im holding back on sending it to them as it will take months to return. I have only had it a week new from drones direct – they are not interested. :-(
Hi Samuel. That’s not good, if you’ve only had it a week and it doesn’t function as advertised then you have a right to return it to drones direct anytime within 30 days for a full refund. I would contact them and ask them to replace it. Don’t give up and consider approaching trading standards if they don’t respect your right to have it replaced.
Check out http://www.which.co.uk/consumer-rights/advice/how-to-get-a-faulty-product-replaced-or-repaired
This is great information. Keep going for 20!
Hi Paul
Does this information also pertain to the Phantom 3 Professional?
I haven’t flown my drone yet. I am still in the pre-flight training mode…
Bob
Hi Bob, yes it does. Good luck with the flying, let me know how it goes.
Many thanks for these valuable tips, Paul!
Your welcome Adomas
Great Tips ! , great detailed tutorial , each claim has a great point and each point is explained in details !
Paul, excellent article. I wish I had read these 3 months ago. But now that my P3 is back in my possesion after 3 weeks of repair time away I will be following these tips!
Thanks for the great information. I have a Phantom 3 Standard which I have owned for about 6 weeks and flown approximately 15 times. I have updated the firmware and calibrated the IMU. I always fly away from town centres and power lines, and make sure I have at least 9 Satellites connected. On at least half of my flights the controller has automatically gone into ATTI mode in mid flight.
My questions are: Can the Return to Home function still be used if the Phantom 3 has gone into ATTI mode in mid flight? Also is this a normal thing for the Phantom 3 to be doing or do I have a fault?
While I am comfortable flying in ATTI mode at closer distances, I would hate for this to happen at a much greater distance and then not be able to get the Phantom to return to home.
Please excuse my very late reply Duncan but I’ve somehow missed your post and your questions are good good so I’ll answer them now.
The drone requires GPS in order to RTH (Return to Home). If you’ve chosen to fly in Atti mode and initiate RTH it will switch back to using GPS automatically. If however the drone has no GPS signal you’d be out of luck and would need to steer it home manually.
The Phantom should only switch to ATTI itself if it loses connection to the minimum number of satellites, I have seen this happen a couple of times but it’s normally when operating near obstacles or in areas that may have heavy interference. If you’re seeing it happen that much I’d consider getting the system checked out.
A good thing to practise is flying in ATTI mode using the map on the iPad / iPhone alone. This can be done by running the simulator rather than actually flying as it still allows you to learn to understand the orientation and direction of thew drone without visual guidance. Not having sight of the drone is always scary and should be avoided at all costs but with a bit of practise in the sim you can learn to climb to a safe altitude and navigate back to your position using ATTI until you regain vision on the drone.
I have a new phantom 3 advance and no matter what I do I cant get the compass to calibrate I have tried it by a lake on a mounting but nothing works? what am I doing wrong?
Hi Darren, sorry for the late reply but if you’re still having a problem can you be a little more specific about what happens?
I wish I’d read this article before my maiden flight. No problems occurred but this is a super reference. Thanks for writing it.
Glad it was useful, happy flying.
Priceless info!! Thank you so much for this! I’m a noob (bought my P3P a wk ago) and these tips will definitely make me feel more at ease when I fly. I really should stop watching fly away videos on YT too…lol
Super cool post. Thank you so much!!
The DJI manual states that the aircraft should “always” be calibrated at every new flight location. It notes that regular calibration is required for optimal performance. It sounds like you are saying not to do this for fear of getting a worse calibration. But isn’t it equally possible that you could also get a better calibration? I like the advice of checking the sensor and seeing if the calibration looks off. But then I am curious where you got those numbers from, the 1400 to 1599.
Hi Kevin.
I disagree with what it says in the manual for the reasons noted in my post. If the flight is somewhere that is unlikely to have any negative effect on a calibration and the sensors dont show any weirdness then yes it might be worth recalibrating but it’s understanding those points that make the difference. The numbers listed are what I have experienced as normal deviation, any more and I feel the calibration needs more thought / action.
Thanks for posting this info. Very helpful for a newbie – like me. Your hard work in producing such a professional guide is appreciated!!
Hi Paul. Some great info here for new pilots, which I’ve bookmarked. Thanks for the write-up.
Thanks for the awesome info! If you don’t mind can i share to phantom3 facebook page?
You’re welcome, glad it was useful. Yes, please feel free to spread the word and link back to this page.
Paul Joy,
Thank you for these tips and explanations you have provided. I’ve danced in and out of forum after forum trying to grasp the true meaning of the “Smart Go Home” feature in the DJI Go App. I have book marked your site for future visits. I have also shared this well written article in the “Official DJI Owners Group’s” Facebook page so others like myself will know more about controlling their units. I am still looking for information on the “IOC” toggle that is not functional on my DJI Go App. My hunch guides me to think this is a future Firmware upgrade feature yet to come. [P3P Firmware: v1.5.00.30 RC Firmware: v1.5.70, App: v2.4.2 using ipad air)]
Thanks for leaving a comment Jerry, I’m glad you found the post useful. IOC or “Intelligent Orientation Control” is already implemented. Check out the following video which should help…
https://www.youtube.com/watch?v=9Lj_9yiSte0
Very good advices! Some of them have to be practice before i clearly understand the impact to each action or control i set… By example, flying in atti mode, how will it help me more to control the orientation of the aircraft when the the wind is pushing my it away from the landing point i decided that was best to have for a safe landing?
I am not sure I agree with the advice about flying in ATTI mode or it being better than GPS. If the wind is blowing, let’s say 5-10 miles an hour, you will really need to be focused on keeping your drone in position and could more easily lose sight or track of it. At least in GPS mode, it is going to hold position and not drift away. I do agree that ATTI mode is good to know if GPS fails, but to me, ATTI mode just gives you one more thing to potentially distract you. I’ve found the Phantom to hold remarkably stable in GPS mode.
Hi Kevin. I don’t think I said it was better than GPS. For many shooting situations ATTI can certainly help in producing smoother shots but there are other situations where GPS will be more helpful. The point I make is that it’s a good idea to practise flying in ATTI mode as well so that you’re not fully reliant on the GPS system alone and can comfortably switch to either mode and have an understanding of the benefits and challenges.
Nice tip for me as a newbee
Hi all in all it was very good to read through all your points, especially for a newbe like me, the points you raise are very well received, people like you help to keep us all on the right track. We are all never to old to learn new tricks. Keep up the good work.
Awesome job. I didn’t know some of those things with GPS/ATTI mode while using Orbit/follow but it totally makes sense. THANKS ALOT!!!
Great Job!!!
Thanks
Nice advices !
Thanks!!
wow, vary nice Dan
There’s one more thing that could save your drone: this is a parachute kit! There are really good ones available, for example the rescue kits from Opale Paramodels that offers a great reliability and the parachutes are pretty resistant. I use it on my S900 and it’s doing great!
By the way, great article to avoid any risk with your aircraft.
Paul,
Thank you for creating this guide. Great information and reminders for every flight. A copy of this will go with me and be consulted every time I fly my Inspire 1.
Thanks for the comment Carl.
For a newbie this is great I have read things that now can be implemented with confidence
I have always followed the guidelines and carried out the required checks without questioning them but after reading the 10 (11) I will now implement your check list
Thanks
Fantastic advice. This is the most comprehensive checklist I have seen with expert explanation. Thanks
Fantastic list and great descriptions of each point. I like to confirm my home point initially by checking the map and making sure the little blue dot and airplane icon are where they should be. Sometimes I have problems getting the map to appear. I have selected the cache maps in background option, and will make sure I have the map on screen in an area with wi fi on…widening the map view to include the area where I will be flying. Sometimes the map won’t appear when I’m out in the field, ready for take off. This could be that I was not following the procedure I just described properly. But I feel a lot better about things if I can visually confirm my home point on the map as part of the check list procedure. What do you think about this. Again, thanks for this post…it is really great.
Thanks Mike, thats a very important point. I have added a part about checking home point in the failsafe section of the list.
These are very usefull tips. I would add checking the area before start with a magnetometer app.
Thanks Leszek. I’d be very interested how you use a magnetometer during a pre-flight. I understand that you can test for levels but how do you base decisions on the various results?
If the magnetic filed detector shows anything beyond the treshold from 45 to 55 nT I do not calibrate the compass or even start the engines. One day I had a very strange experience. After checking the spot where I was intended to calibrate the compass the magnetic filed detector showed 20 nT. I moved to another spot where the values were acceptable. Then after a few minutes of flying in the vicinity of the spot of magnetic anomaly the Pilot App showed alarm “Compass error”. The strangest thing is that the craft was flying at the altitude of about 25 meters. Who knows mayby it is another “Golden Train” :)
Excellent job and thank you!
Thanks Patrick.