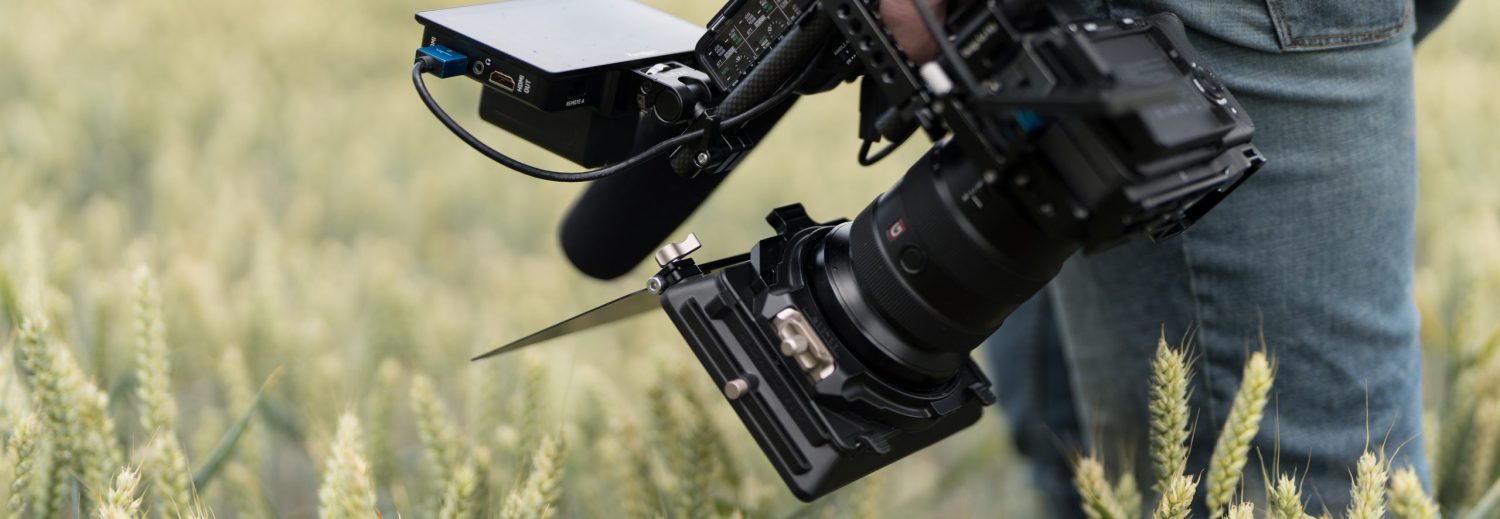
Sony FX3 Custom Buttons & Settings – How I use the FX3
In this post i’m going to show you how i change my Sony Fx3 Settings & controls to make my shooting as efficient as possible whilst providing me with all the information I need to focus and expose correctly.
Sony FX3 / FX30 Custom Buttons & Settings
Focussing
I’m going to start with how i control focus. By default i like to use manual focus and then switch to auto focus as and when the shot requires it.
Focus Hold Button (Lens)
The first control i’m going to talk about is the focus hold button on the lens, this isn’t available on all lenses but all of my Sony lenses have this button so i’ve made it part of my shooting workflow. I programmed the button so that when you hold it the camera will start auto focusing and then switch back to manual focus when you release it.
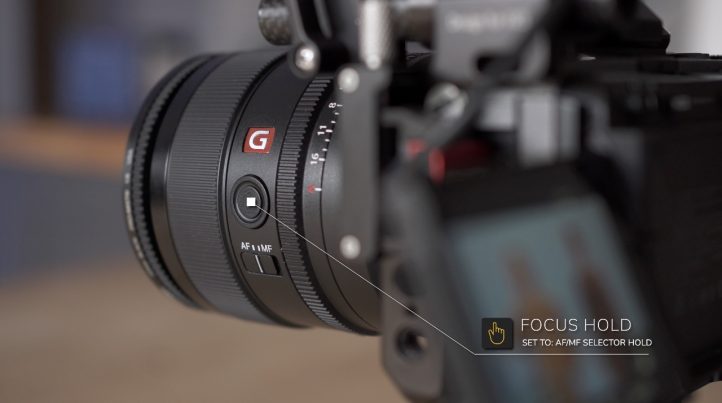
I find this method most useful when filming a scene where you quickly need to focus on somebody’s face, you just hold the button the camera switches to auto focus and uses face eye detection to immediately start tracking faces and focusing on them.
If you want to change this setting set the following:
Menu > Setup > Operation Customize > Movie Custom Key Setting > Lens – AFMF Selector Hold

Custom Button 4
I have the custom button 4 on the back of the camera set to toggle between manual focus and auto focus. This can be useful if I need to enable autofocus for longer periods of time or if I’m using touch focus on the display.

Having a button for AF/MF also provides a quick way to cycle between touch focus and touch tracking. Each time you press the button the mode will change and you’ll see the icon changing on the display.
![]()
If you want to change this setting set the following:
Menu > Setup > Operation Customize > Movie Custom Key Setting > Rear 1 > 3 – AF/MF Selector Toggle

Shutter Button
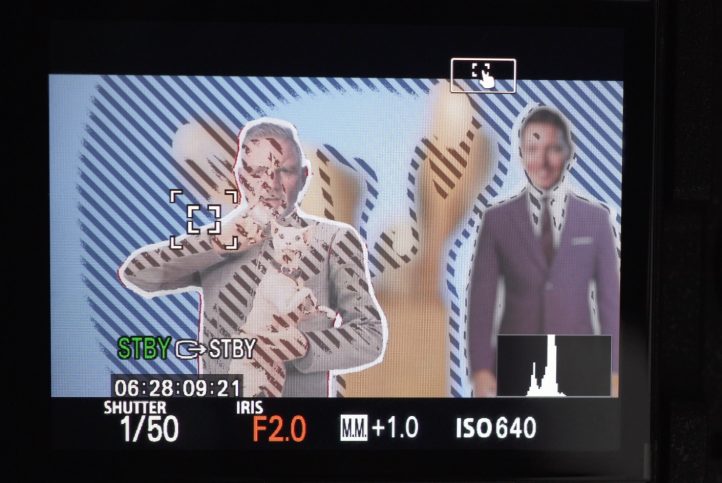
I also perform quick autofocusing by half pressing the shutter button. If using the wide focus area the camera shows multiple areas that are currently in focus. If you switch to a smaller focus area like expand spot you’ll see that half pressing the shutter performs on autofocus and shows which parts of the focus area has been used by turning it green.

This can be very useful if you have a slow transition speed set for normal autofocus as you can then choose either to do a slow focus using the button on the side of the lens or do a fast focus using the shutter button.

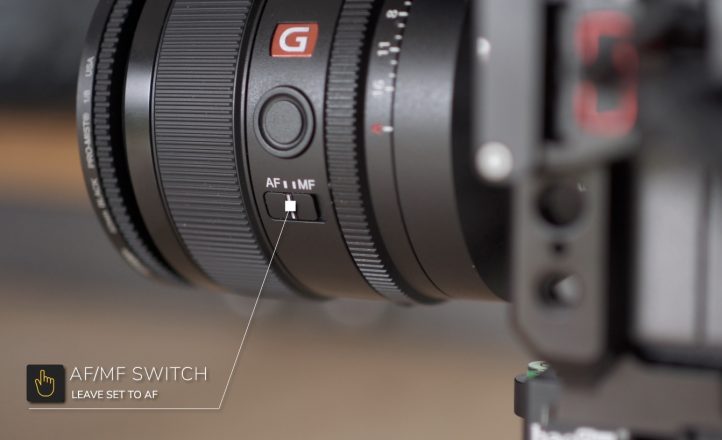
AF/MF Switch (Lens)
If you’re wondering why i don’t use the AF/MF switch on the lens to switch between autofocus and manual focus it’s because if i switch that to manual focus then none of these quick focus modes will work. I find it better to just leave that switch in AF and do the switching in camera.
Focus Area Control
All of my focus area control is done with the joystick (Multi-Selector) on the camera. I have it set to cycle through focus areas when pressing it and by default the focus areas are also moved around by moving the joystick.
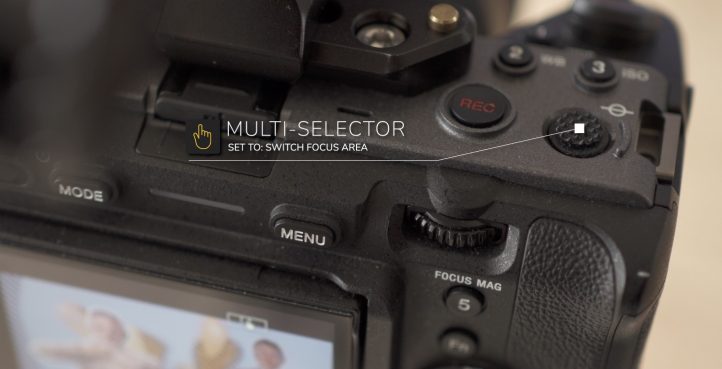
I set my focus area limit so that i only have wide, zone and expand spot available to cycle through as i find i can achieve all of my focusing requirements with just these three focus areas using the joystick. This setup makes focus area control very intuitive.
If you want to choose which focus areas to include go to the following:
Menu > AFMF > Focus Area > Focus Area Limit

You can then choose the focus areas that you wish to include by ticking them. You can see in the image above that I just have the three focus areas ticked.
To set the joystick press to cycle focus areas go:
Menu > Setup > Operation Customize > Movie Custom Key Setting > Top > 4 – Switch Focus Area

Focus Magnification
I use focus magnification a lot when manually focussing and leave this on the default custom button five on the back of the camera.

I set my magnification so that it only uses the x4 zoom allowing me to quickly toggle between x4 and normal with just one press of the button.
If you want to set your focus magnification the same way go:
Menu > AFMF > Focus Assistant > Initial Focus magnification – X4.0

Focus Peaking
I leave leave the focus peaking on off switch control to the default position on the control wheel on the back of the camera.

On the FX3 the peaking switches off when you change to autofocus, I wish Sony would change this because even when the camera is in autofocus mode it would be useful to be able to see what the camera has focused on.
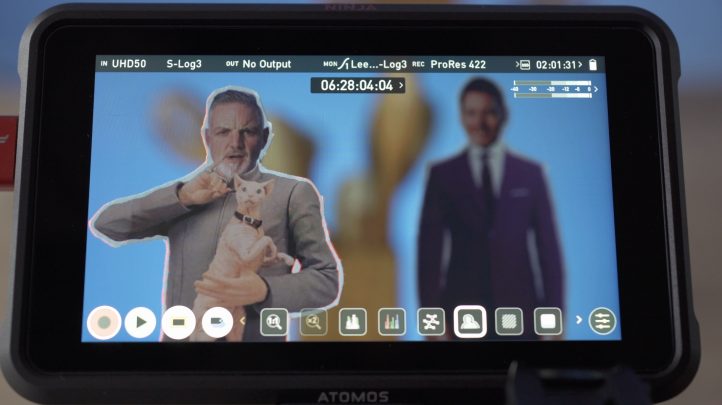
To help with this i normally use either my Atomos Ninja V or Atomos Shinobi which allow me to leave peaking on when the auto focusing is enabled.
Exposure
Next we’ll look at the settings I use to help monitor and set exposure.
Flexible Exposure Mode
I use flexible exposure mode with the main exposure controls in the default positions on the FX3. If you want to find out more about Flexible Exposure Mode see my Sony FX3 Flexible Exposure Mode Explained post.

Using flexible exposure mode gives me the ability to quickly access shutter speed, aperture and iso using the buttons on the camera. I’m also able to use these same buttons to lock those settings and set each of them to auto.

I set up my FX3 so that i have iris control with the front dial, ISO control on the rear dial and shutter speed control on the control wheel on the back of the camera. For me the default option of having the shutter speed on the control wheel makes it very intuitive because I can press the shutter button to lock and unlock it and then just rotate the wheel to adjust it.
Monitoring Exposure
In terms of monitoring I normally use either the Atomos Ninja V or my Atomos Shinobi in conjunction with the FX3’s display.
On the FX3’s built in display I have the histogram enabled which gives me a quick exposure reference.

Then on the external monitor i have the waveform displayed allowing me to see in more detail where the exposure falls in the frame.

Zebras
I use zebras on both displays, i have the FX3 set for exposing skin tones correctly, this is normally around 50% IRE for S-Log 3 but varies depending on the picture profile being used.
On the external monitor I set zebras to show any areas that are clipping.

Using both displays together this way saves me from having to switch between different zebra levels during shooting and also keeps my external display free from skin tone zebras for a cleaner image when I’m composition a shot.
Other Buttons
White Balance
For setting white balance I access the menu using the dedicated white balance button on top of the camera.

Function Menu
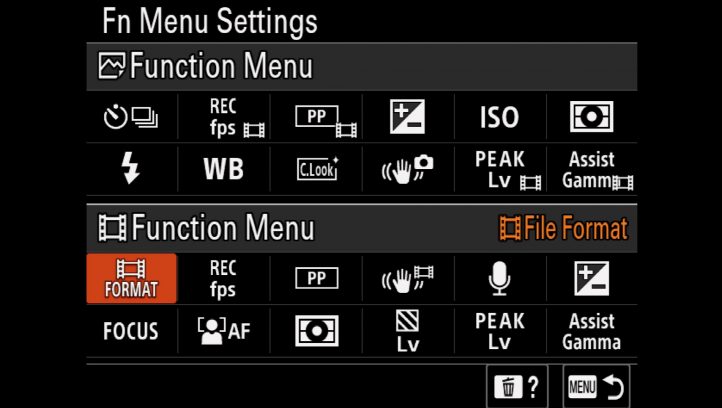
I configure the function so that it lets me control settings that i don’t have access to via a button and quickly displays important information about my settings.

On the top row I have items that affect the recording so i have file format, frame rate, picture profile, steady shot, audio recording level and exposure compensation.

The bottom row are more about camera features and tool settings. In there I have focus mode, face eye priority, metering mode, zebra level, peaking level, and the gamma display assist.
If you want to change your custom function menu go to:
Menu > Setup > Operation Customize > Function Menu Settings
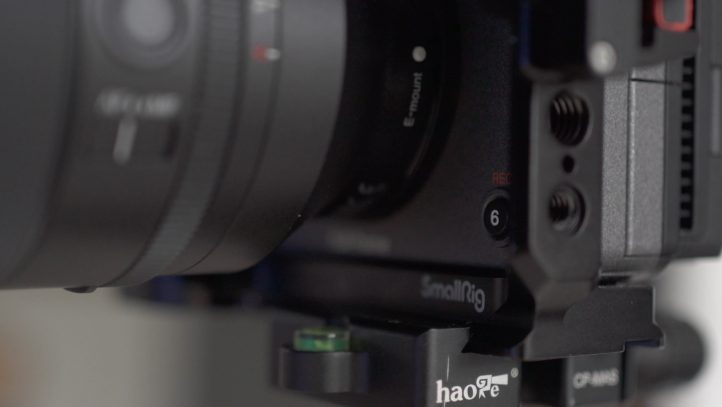
Record Buttons
Finally i’m going to talk about record buttons. I leave the main record button and the front record button as default as I find them both useful depending on how i’m holding the camera.
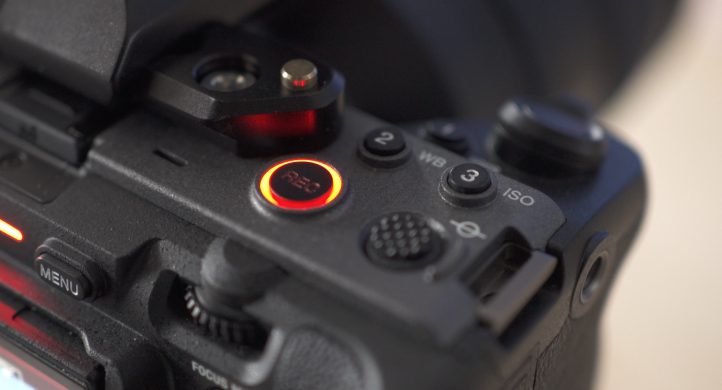
If i’m holding the camera by the body I’ll generally use the record button on top of the camera. If i’m using my right hand to hold the camera by a handle i’ll often reach to the record button on the front of the camera using the thumb on my left hand.
Final Thoughts
I think that’s it in terms of camera controls if you try out any of these methods then please do let me know how you get on. Alternatively if you found a good way of working and you want to share that please do leave a comment. The video at the top of this post shows all of these settings being applied to the camera but if you prefer you can also view this video on my YouTube Channel.
Purchase links for kit shown in this post:
The following are affiliate links. If you use these links to purchase products then I will make a small commission on the sale which is used to fund the production of these posts. Thanks for your support.
Camera: Sony FX3
Lens: Sony 50mm GM
Cage: SmallRig half cage
Rod: SmallRig 4″ carbon rod
Monitor mount: Nitze N54-F5
Recorder: Atomos Ninja V
ND Filter – Polar Pro PMVND 2-5


Wow…
I am a beginner.
I was wondering how to have fun while learning to get the max out of the FX3.
And suddenly, you appeared! ;-)